Buenas!!!!!!!!!
¡¡Hoy os traigo mi primer snail mail!! Como me hacía mucha ilusión empezar a hacer este tipo de proyectos y la verdad que soy una enamorada de lo tradicional,me gusta escribir cartas, enviar postales cuando viajo, leer un libro de verdad, … pues empecé con mi propia hermana, ella lo hará a su estilo (es diseñadora gráfica y aprendiz de tatuadora) y yo al mío, nos hemos hecho Penpals!!!
Cuando me llegue la primera carta de mi sister ya os la enseñaré!! No lo dudéis!!
Escogí una estructura sencilla para empezar, con seis papeles de 15×15 cm creé tres bolsillos, pegándolos de dos en dos, en forma de U para crear el bolsillo por la parte de arriba. Una vez tenemos los tres bolsillos, teniendo cuidado de que la abertura esté mirando hacia arriba, los unimos con washi tape por delante y por detrás, comprobando que se dobla bien y nos permite cerrar cada bolsillo.
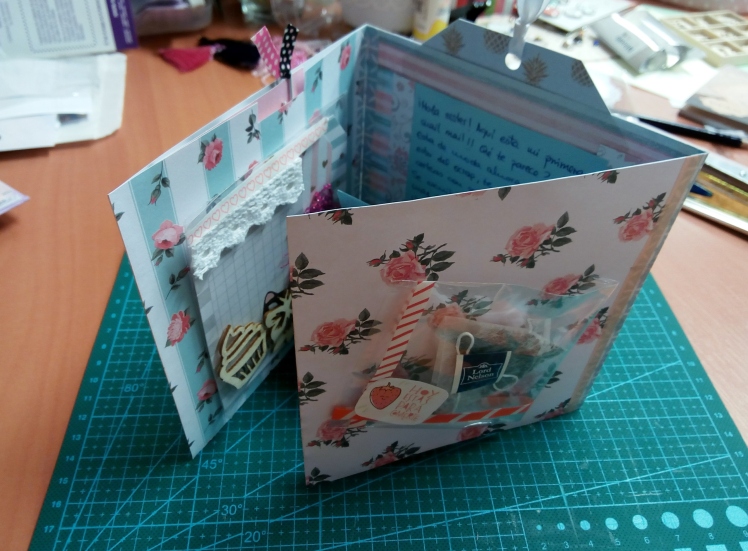
Una vez unidos, hacemos una muesca en los bolsillos y manos a la obra, empieza la mejor parte, decorar el snail mail y preparar las chuches scraperas!!
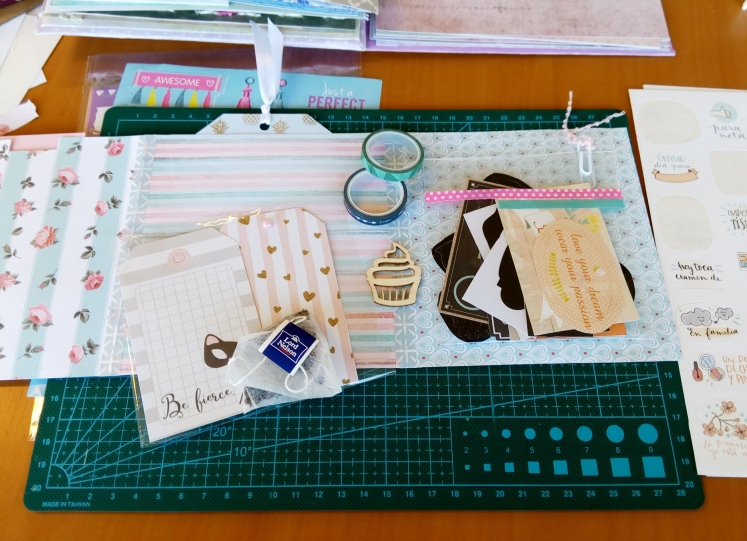
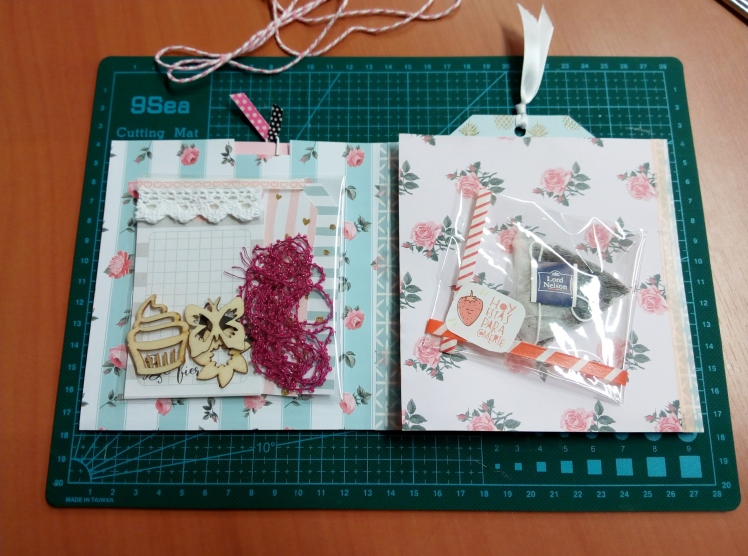
Yo puse en un bolsillo una tarjeta de Project life, en otro bolsillo hice un tag con un papel de piñas super chulo y le puse una foto nuestra y para el interior preparé tres bolsitas de plástico para las chuches. Una tenía tags de diferentes formas, otra tenía pegatinas con frases chulas, pegatinas de pizarra y alguna maderita, y en la última bolsita le puse un saquito de té. Dejé el bolsillo central para la carta y listo!
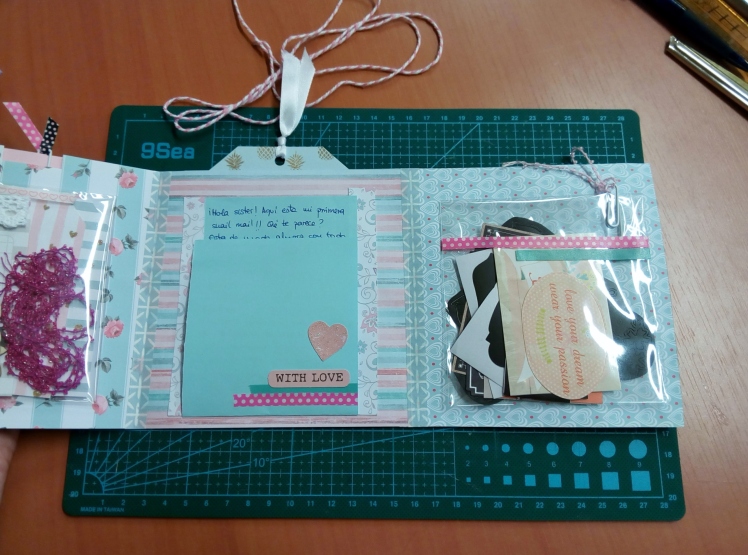
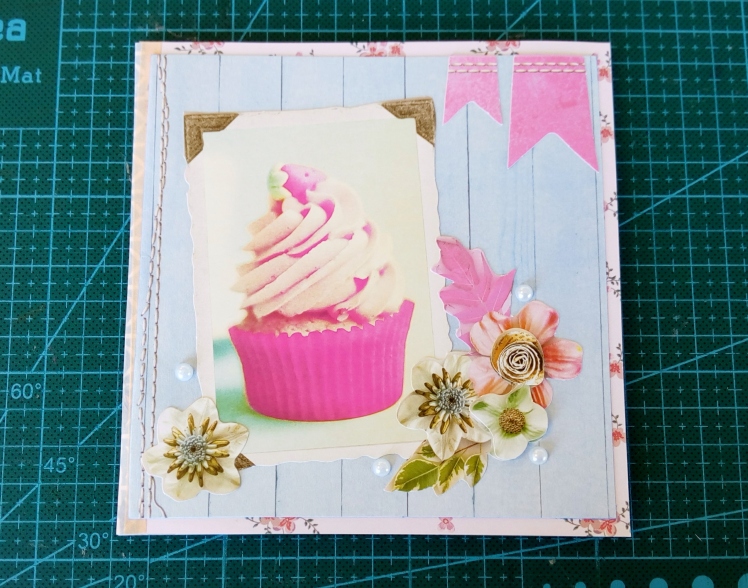
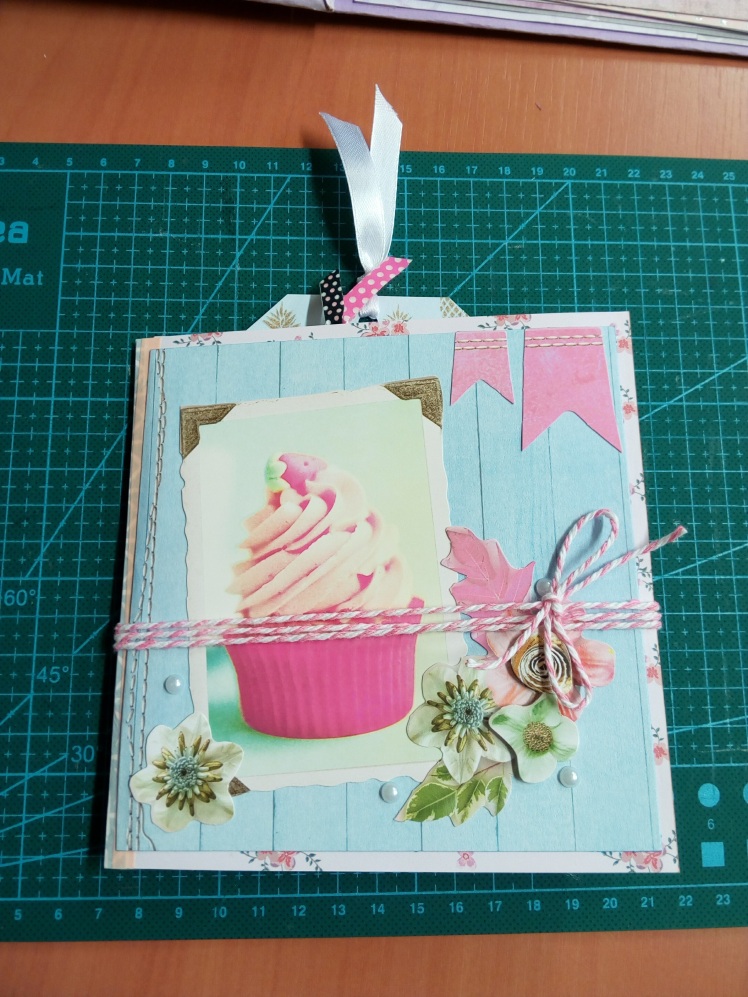
Para la portada elegí una de las páginas de tarjetas precortadas que suelo usar de la colección DecoTime, una de las marcas de material que encuentro en mi tienda de cabecera aquí en Hasselt. Para el cierre un poco de cordel a juego y algunas cintitas para acompañar los tags de los bolsillos, así le damos un poco más de vidilla al tema!!
Ya estoy esperando la respuesta de mi hermana!! Qué ganas de seguir!!
Espero que os haya gustado y hasta la próxima!!! A disfrutar del día!!
A SNAIL MAIL VERY SWEET!!
Hello!!
Today I am going to show you mi first Snail mail!!! How I was excited to start with this kind of projects and I am a lover of traditional things like write letters or send postcard when I am travelling, I decided to start with my sister, she is going to use her own style (she´s Graphic designer and apprentice tattoo artist) and me with my style. We are now Penpals!!
When I will receive the first letter from my sister I will show you!! For sure!!
I chose a simple structure to start, with six papers of 15×15 cm I made three pockets, sticking them two by two, in form of U to create the pocket from the top. When we have the three pockets, we have to take care that the open part is upwards and link them with washi tape on both sides, checking that it folds ok and we can close all the pockets.
When we have everything united, we make a notch on the pockets and let´s do it! The best part starts, decorate the snail mail and prepare the scrap´s sweets!
In one pocket I put a Project life card very nice, in other pocket I put a tag made with a pineapples on it very funny and with a nice picture from us. I prepared three small plastic bags to put the presents inside. One bag with tags, other with stickers, die- cuts and wooden forms and the last bag with a tea sack. The central part had the letter and that´s it!
For the cover I chose one of the pages of pre-cut cards that I usually use from Decotime collections, one of the brands that I can find here in Hasselt. To close the snail mails I used a few of string and some ties to make funnier.
I am waiting from my sister’s answer!! I already want to make the next!!
I hope you liked it and see you son!! Enjoy your day!
